Account groups
A group is a coloured label on a set of accounts — and the unit every automation restricts itself to. Bind a folder to a group and only those accounts buy for it.
Manage groups on /accounts, and the Groups column of the table.
What a group is for
A group is a coloured label you put on accounts. On its own it just tidies the list — but it is also the unit every automation restricts itself to.
Once accounts are grouped, you can say things like this folder of filters only buys with the warehouse accounts, or auto-offers only go out from these two.
Groups are yours, not the workspace's. Each member has their own, even over the same accounts, and nobody else in the workspace sees them. This is what makes a shared folder work: when two people subscribe to the same folder, each one's copy uses their own group.
Creating and assigning
Manage groups, top right, is where groups are born and die.
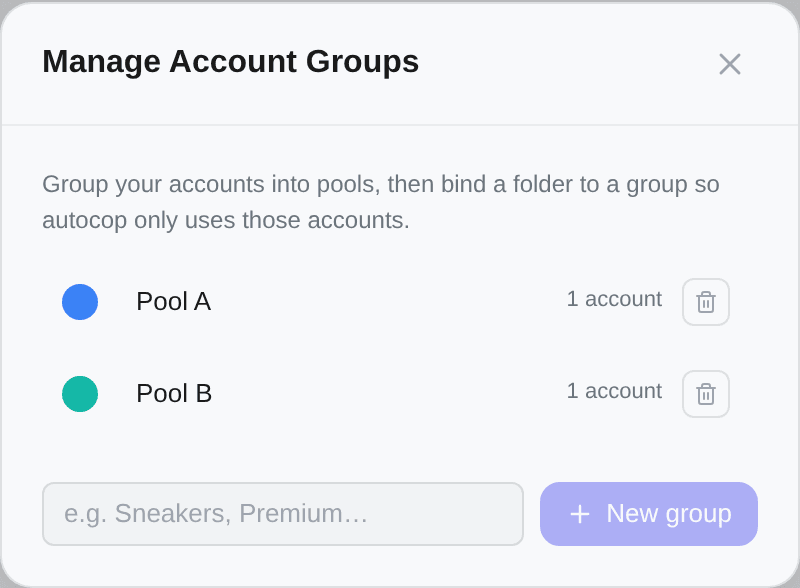
Type a name at the bottom and press New group. That is the whole creation — the colour is not chosen at creation; a new group starts plain, and you set its colour afterwards by clicking the swatch at the left of its row. The name is an editable field on the row too: type over it and click away.
Each row also carries how many accounts are in the group, and a trash icon.
Names must be unique among your own groups.
Assigning is done from the table, not from the account detail. Every row's Groups column ends with a +:
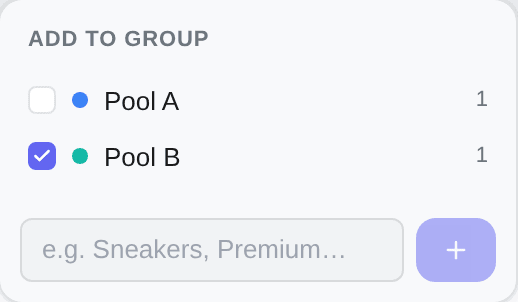
Tick as many groups as you like — an account can belong to several — and the chips appear on the row immediately. Each chip has an × to remove it without opening anything. The bottom of the popover creates a group and assigns it in one step, for when you realise mid-tidy that you need one more.
Two other ways in:
- In bulk. Tick several rows and use Add to group in the bar at the bottom. It only ever adds; it never removes a group an account already had.
- On mobile, where there is no Groups column, the account card's
⋮menu carries Assign to groups.
To filter by group, open View → Groups beside the status tabs. Search for a group and select it; it is one group at a time, and it combines with the search box and the status tabs. Use Clear all in View to remove the group filter. This works on desktop and mobile, and the selection is included in the page URL when you share it.
Where groups actually bite
| Binding | Where | Effect |
|---|---|---|
| Folder → account group | Folder menu on /filters → Assign account group | Only accounts in that group are used for autocop and manual buys on filters in that folder |
| Auto-offer pool | Settings → Purchase Preferences → Auto-offers | Only accounts in the selected groups send automatic offers |
| Pre-order pool | Settings → Purchase Preferences → Pre-orders | The accounts used for pre-orders, per country |
The global manual-buy pool wins over a folder binding. If you have set a global pool for manual purchases, that is what a manual buy uses, whatever the folder says. The folder's own help text says so where you set it.
Deleting a group does not delete accounts. Folders bound to it fall back to the full eligible account pool — the confirmation says exactly that. It is a widening, not a stop, so check your folder bindings after cleaning up groups.
How to actually split them
The useful splits are the ones that match a real constraint:
- By address or warehouse — because shipping settings already group by address, and matching the two keeps things predictable.
- By country — a French account is a poor fit for a filter watching Poland, and a pre-order pool is chosen per country anyway.
- By role — accounts you use for cheap high-volume buys, versus accounts you keep clean for expensive ones.
- By team member — when several people share a workspace and each should be buying with their own accounts.
Splitting by brand or by category is usually a mistake: it produces groups too small to give the rotation anything to work with.